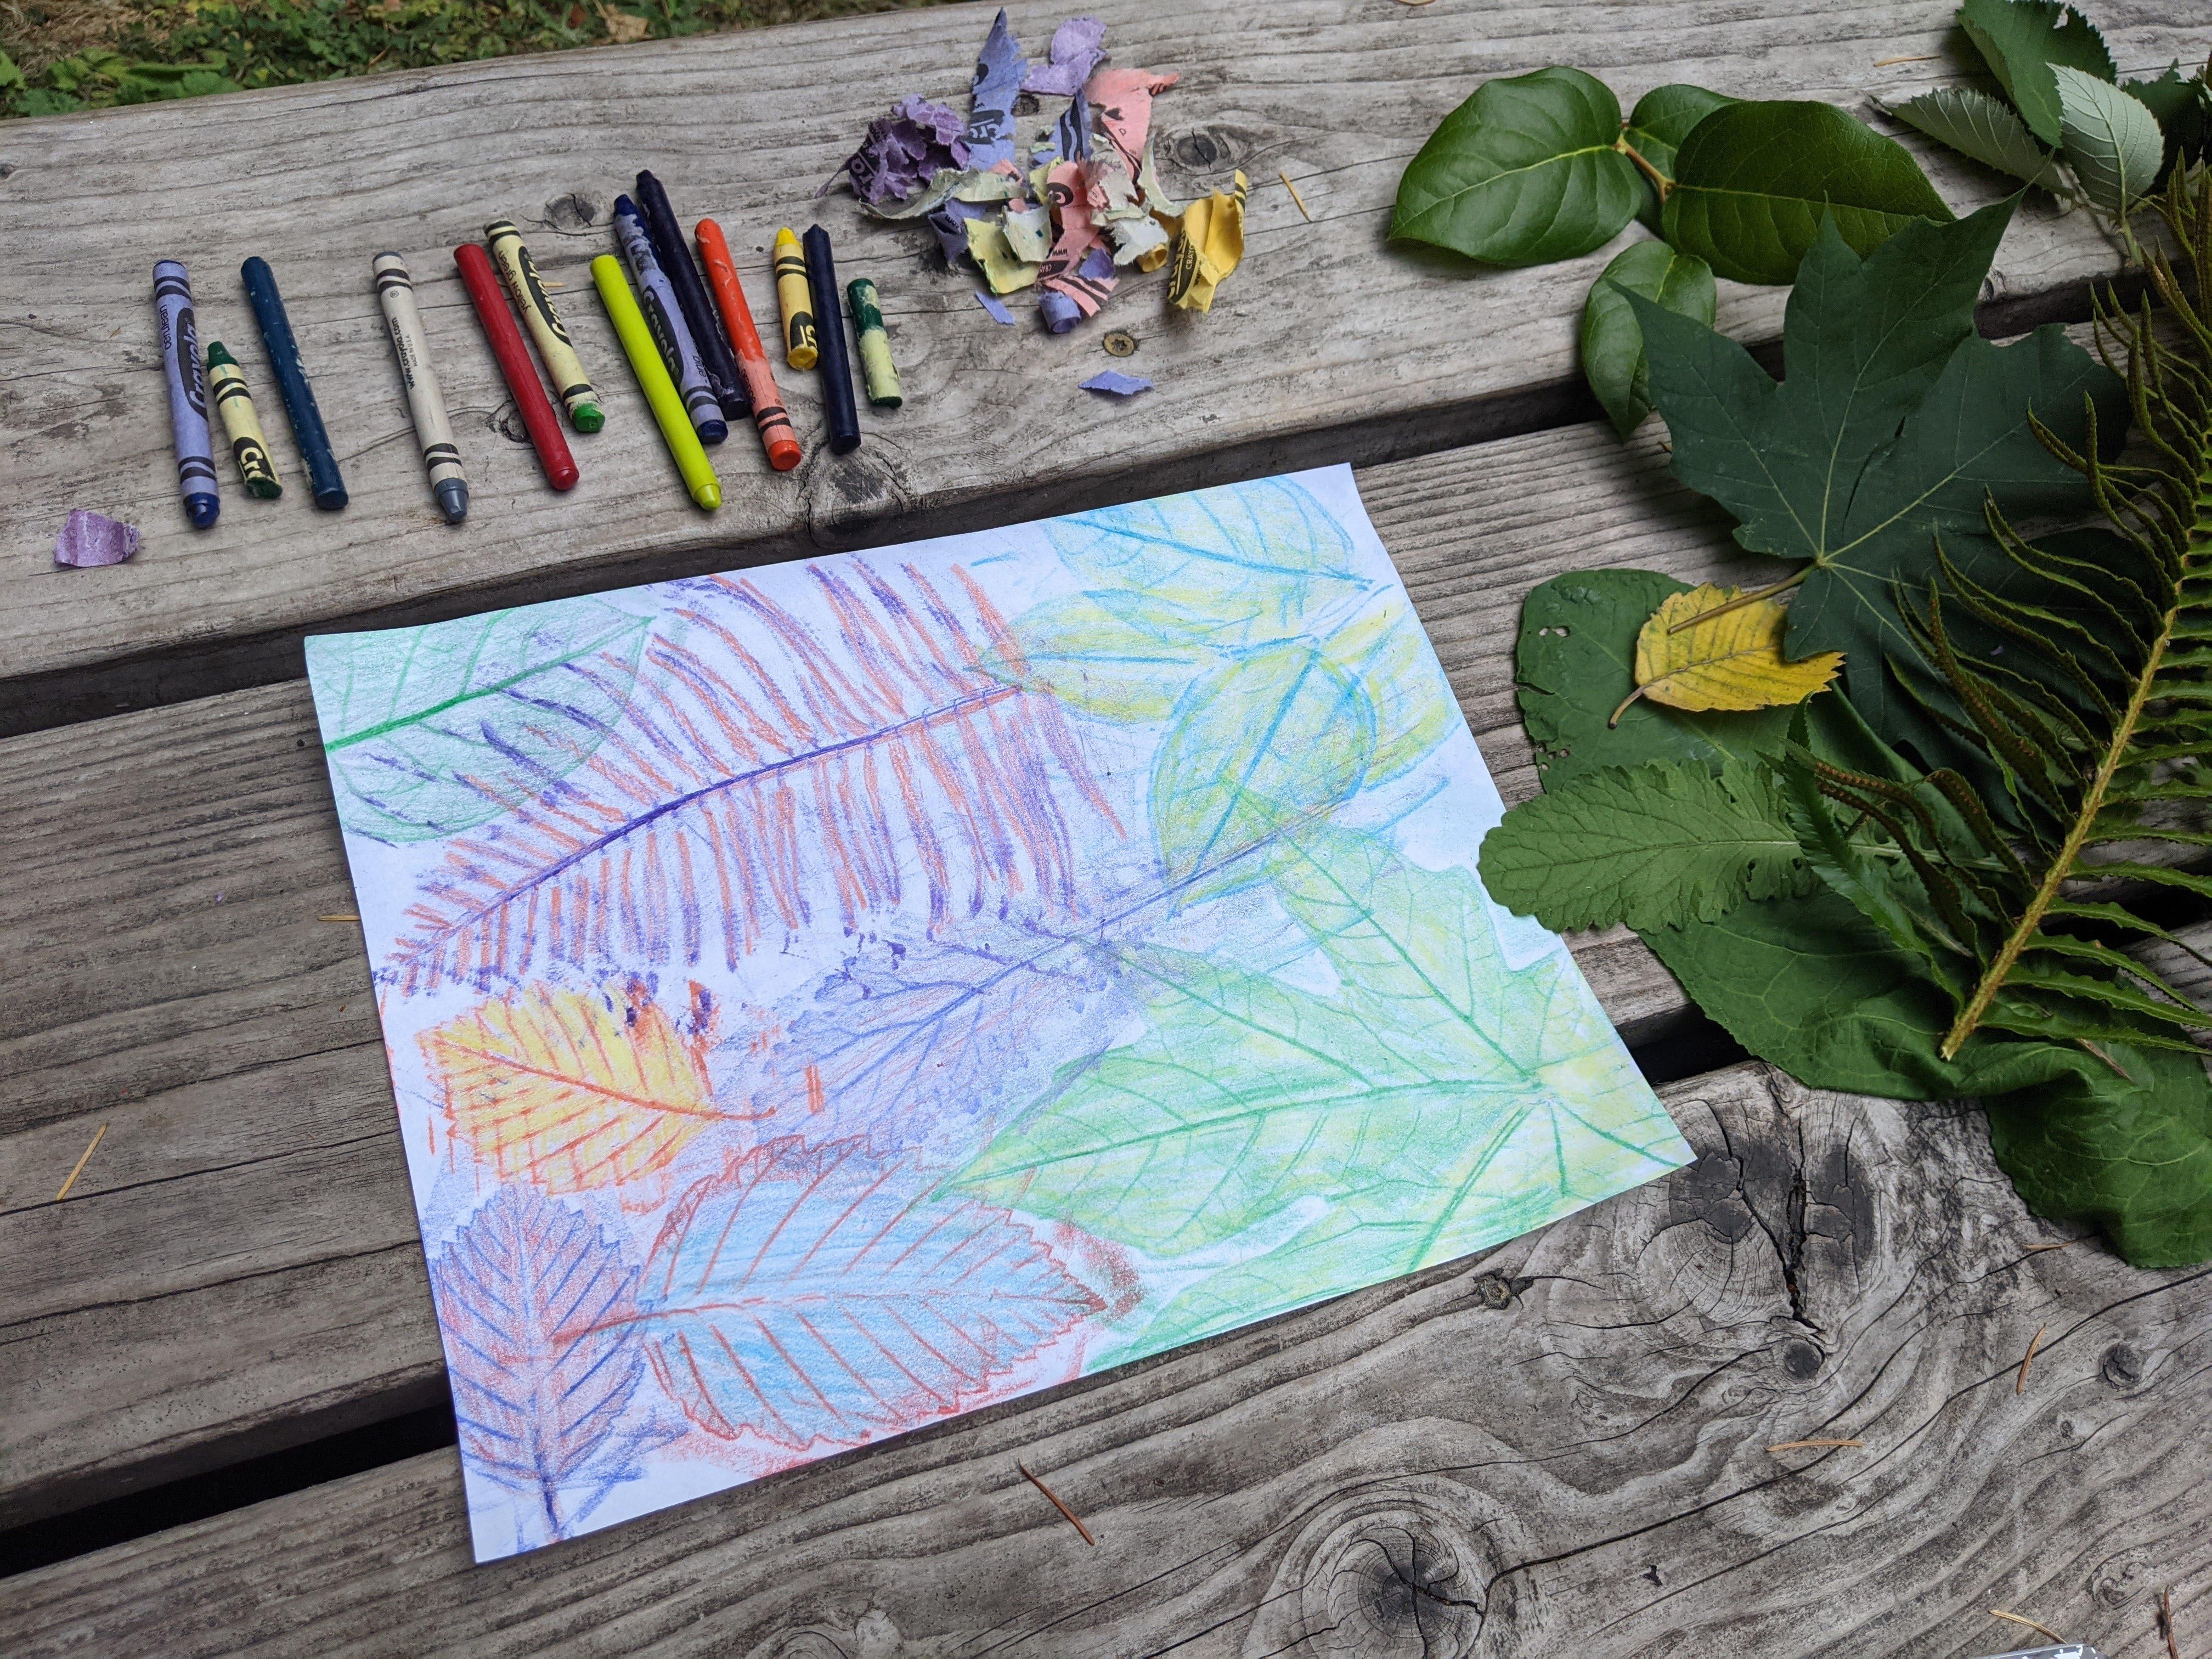
It's Missy, artist and guest blogger for PBS KIDS Utah. My favorite month is September. It’s not too hot and it’s not too cold. School starts. It’s my birthday month. And the plants and trees still look beautiful with all their leaves. I thought it would be fun to use these still living plants for an arts and crafts project this week — a leaf rubbings craft!
Supplies:
- White copy/printer paper
- Crayons
- Fresh cut leaves
Instructions:
- Carefully peel the paper off your crayons. I like to keep a small set of crayons just for rubbings with the paper already removed.
- Working on a smooth flat surface, place a leaf under your paper.
- Hold a crayon sideways and rub it in the area where the paper is covering the leaf. Hold the crayon at different angles while rubbing to reveal all the nice texture of the leaf underneath.
- Put the leaf aside and use another crayon to color your first leaf rubbing.
- Now choose a different leaf and place it under your paper next to the first leaf rubbing.
- Choose a different color crayon, hold it sideways and rub just like you did for the first leaf rubbing.
- Again, put this second leaf aside and choose another crayon to color the second rubbing.
- Continue in this manner until you have filled your entire page with leaf rubbings.
- If you’d like, you can color the spaces between the leaves to make them stand out more. This area is called the “negative space.”
Wrap-up:
If you choose many different colors of crayons, various types of leaves and slightly overlap your rubbings, you will create a very beautiful piece of artwork. It is also fun to identify the leaf types and notice all the little veins running through them. Nature is wonderful! Be creative and have fun!