
Missy's Dot Painting

Email share

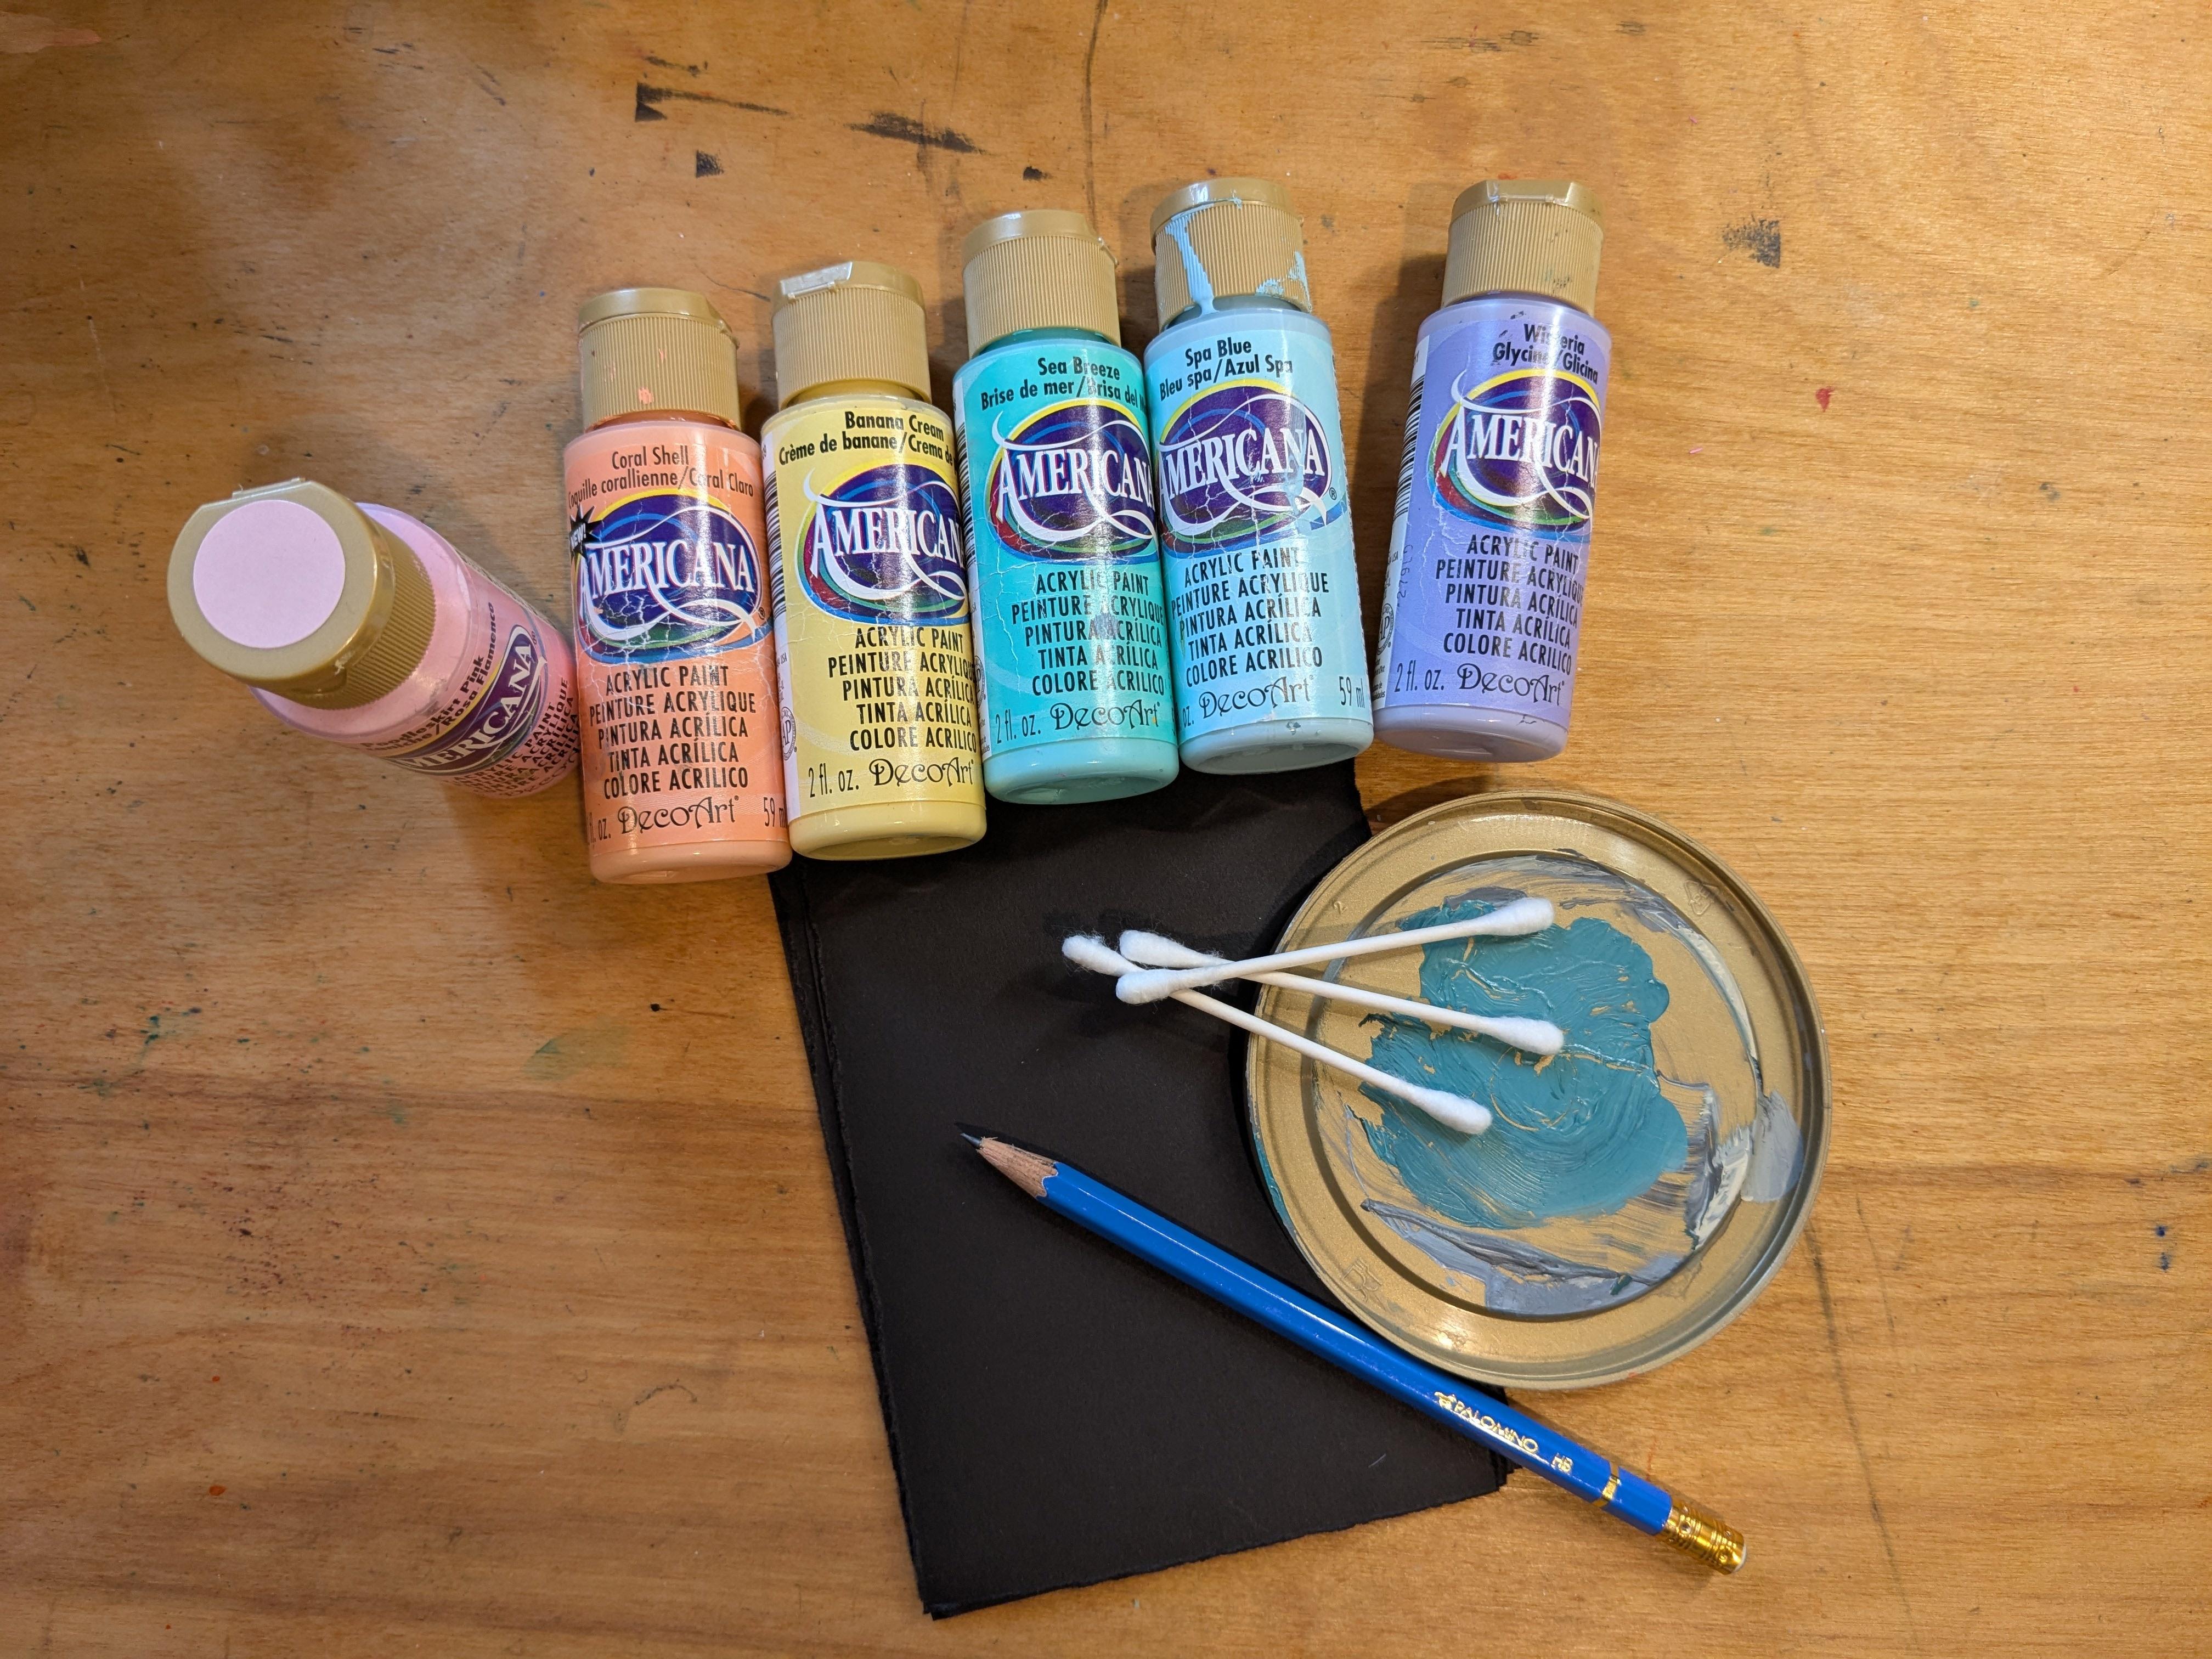
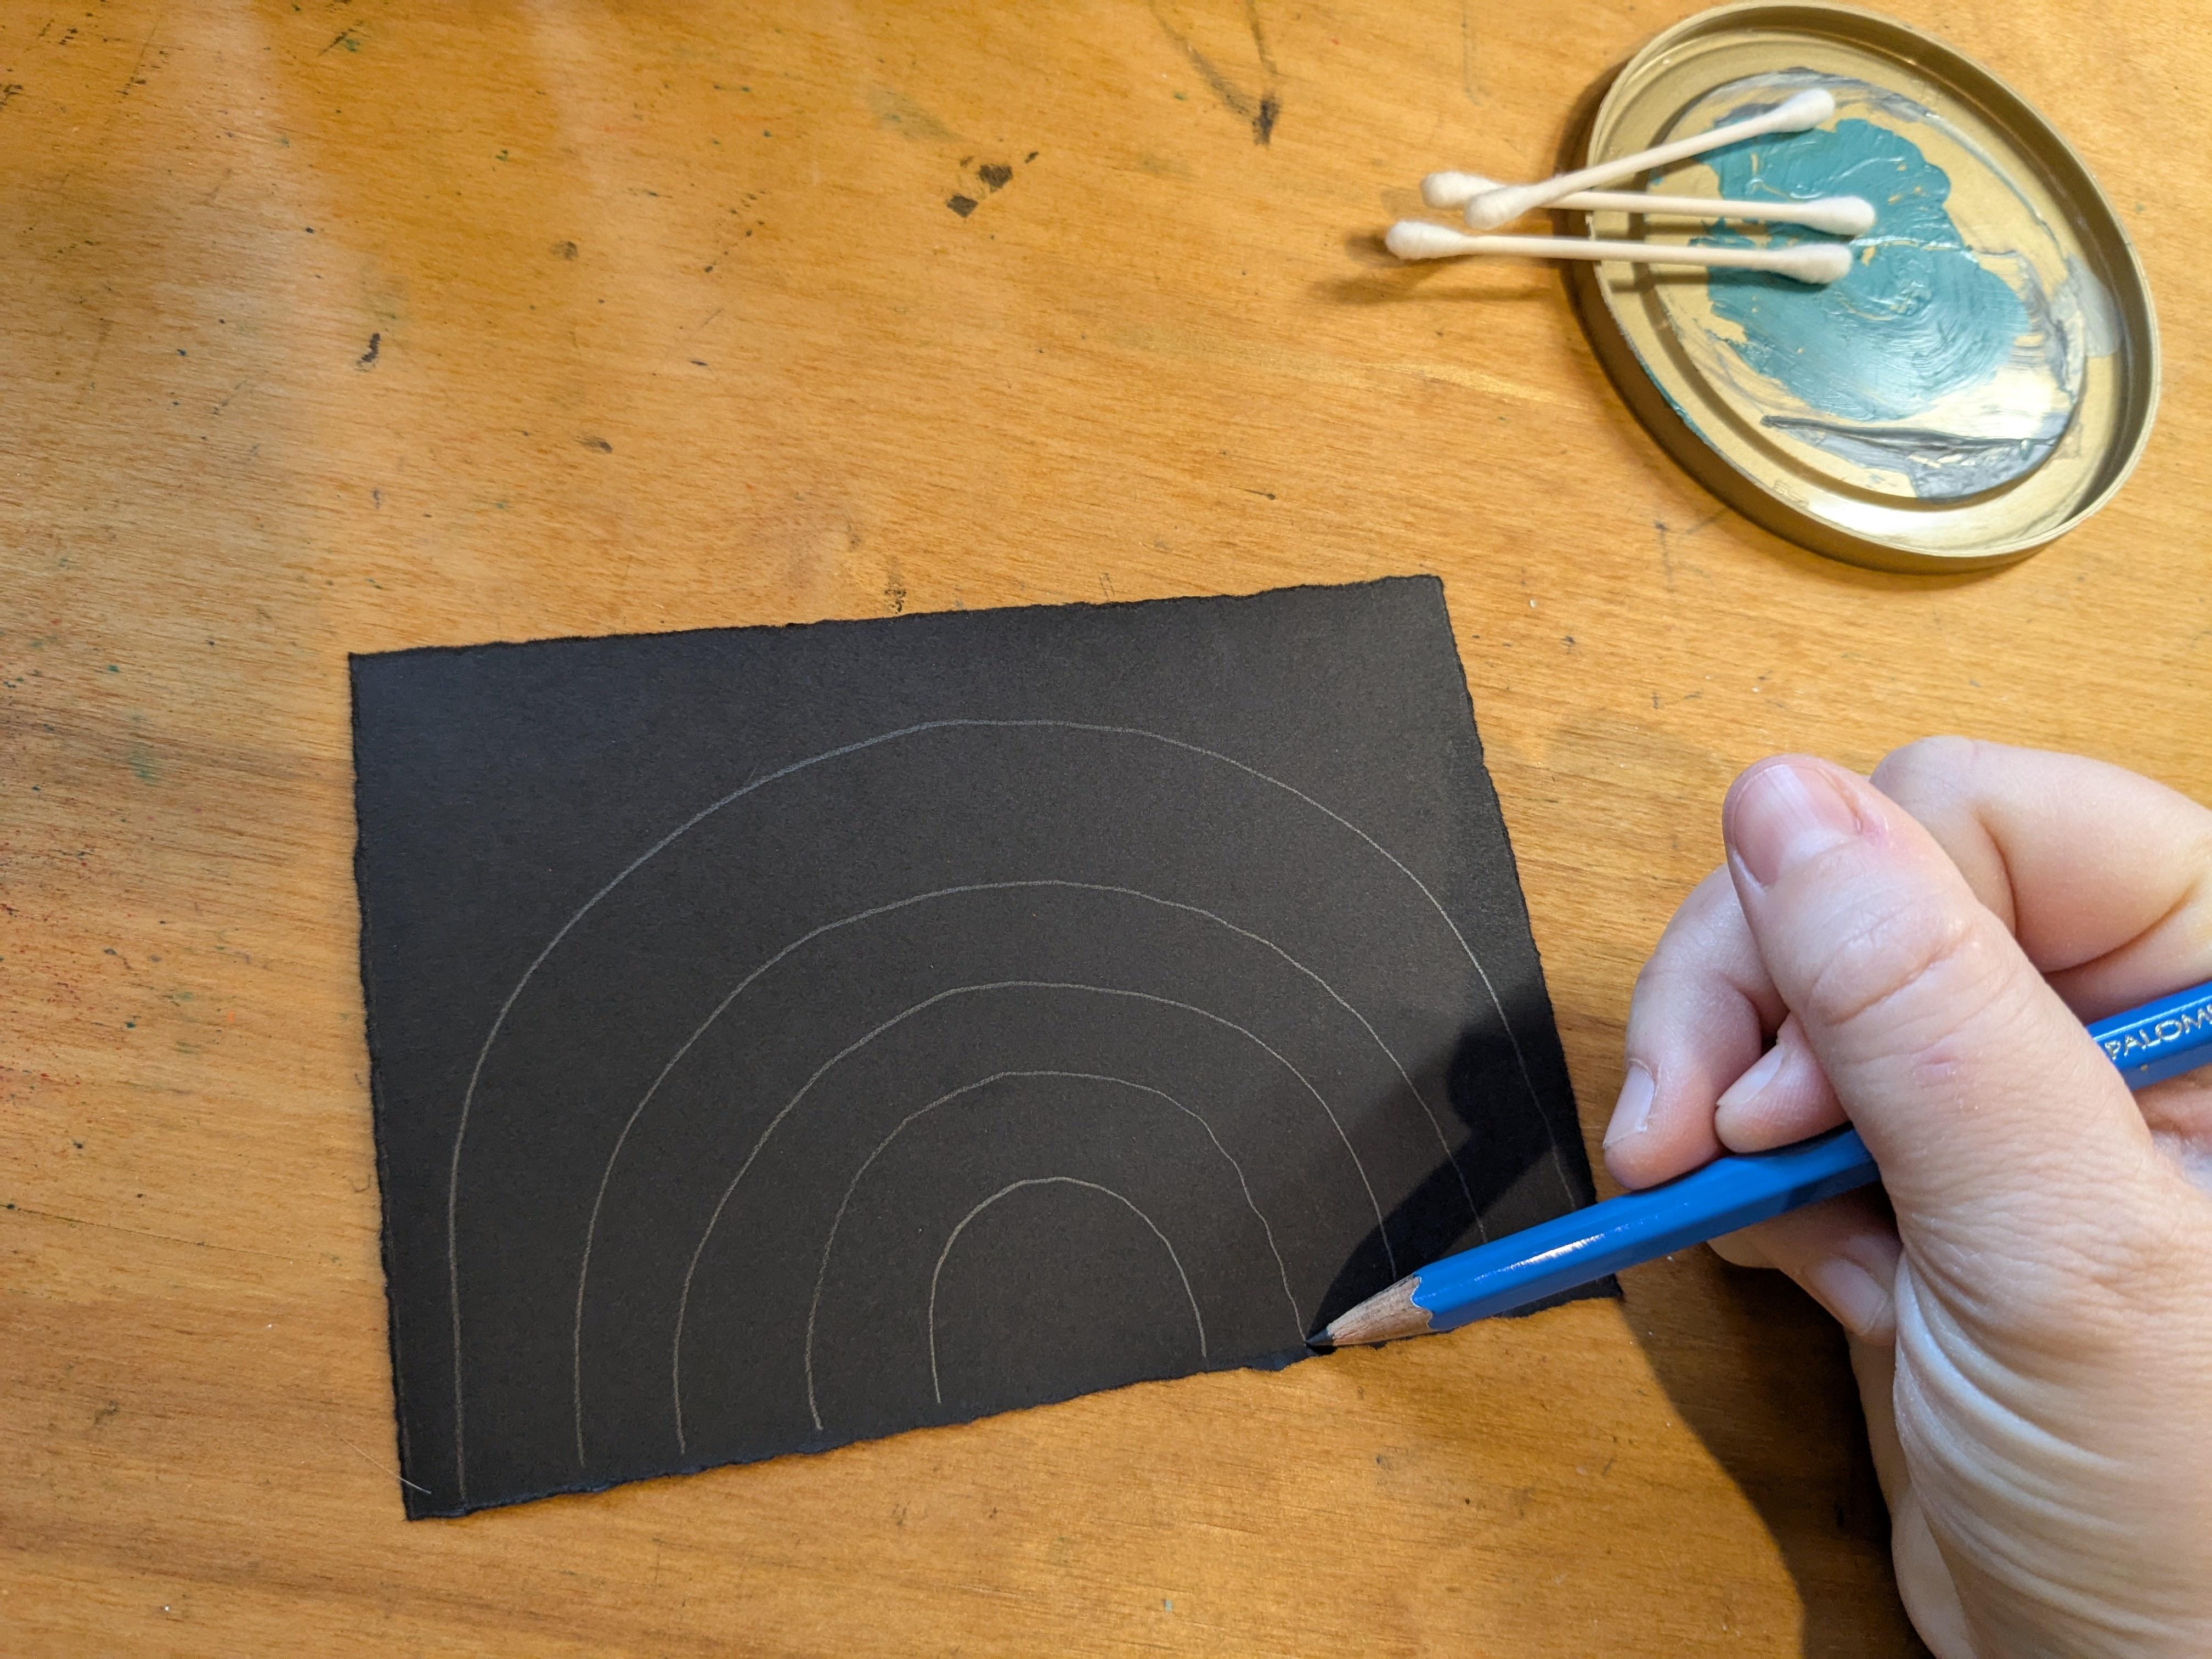
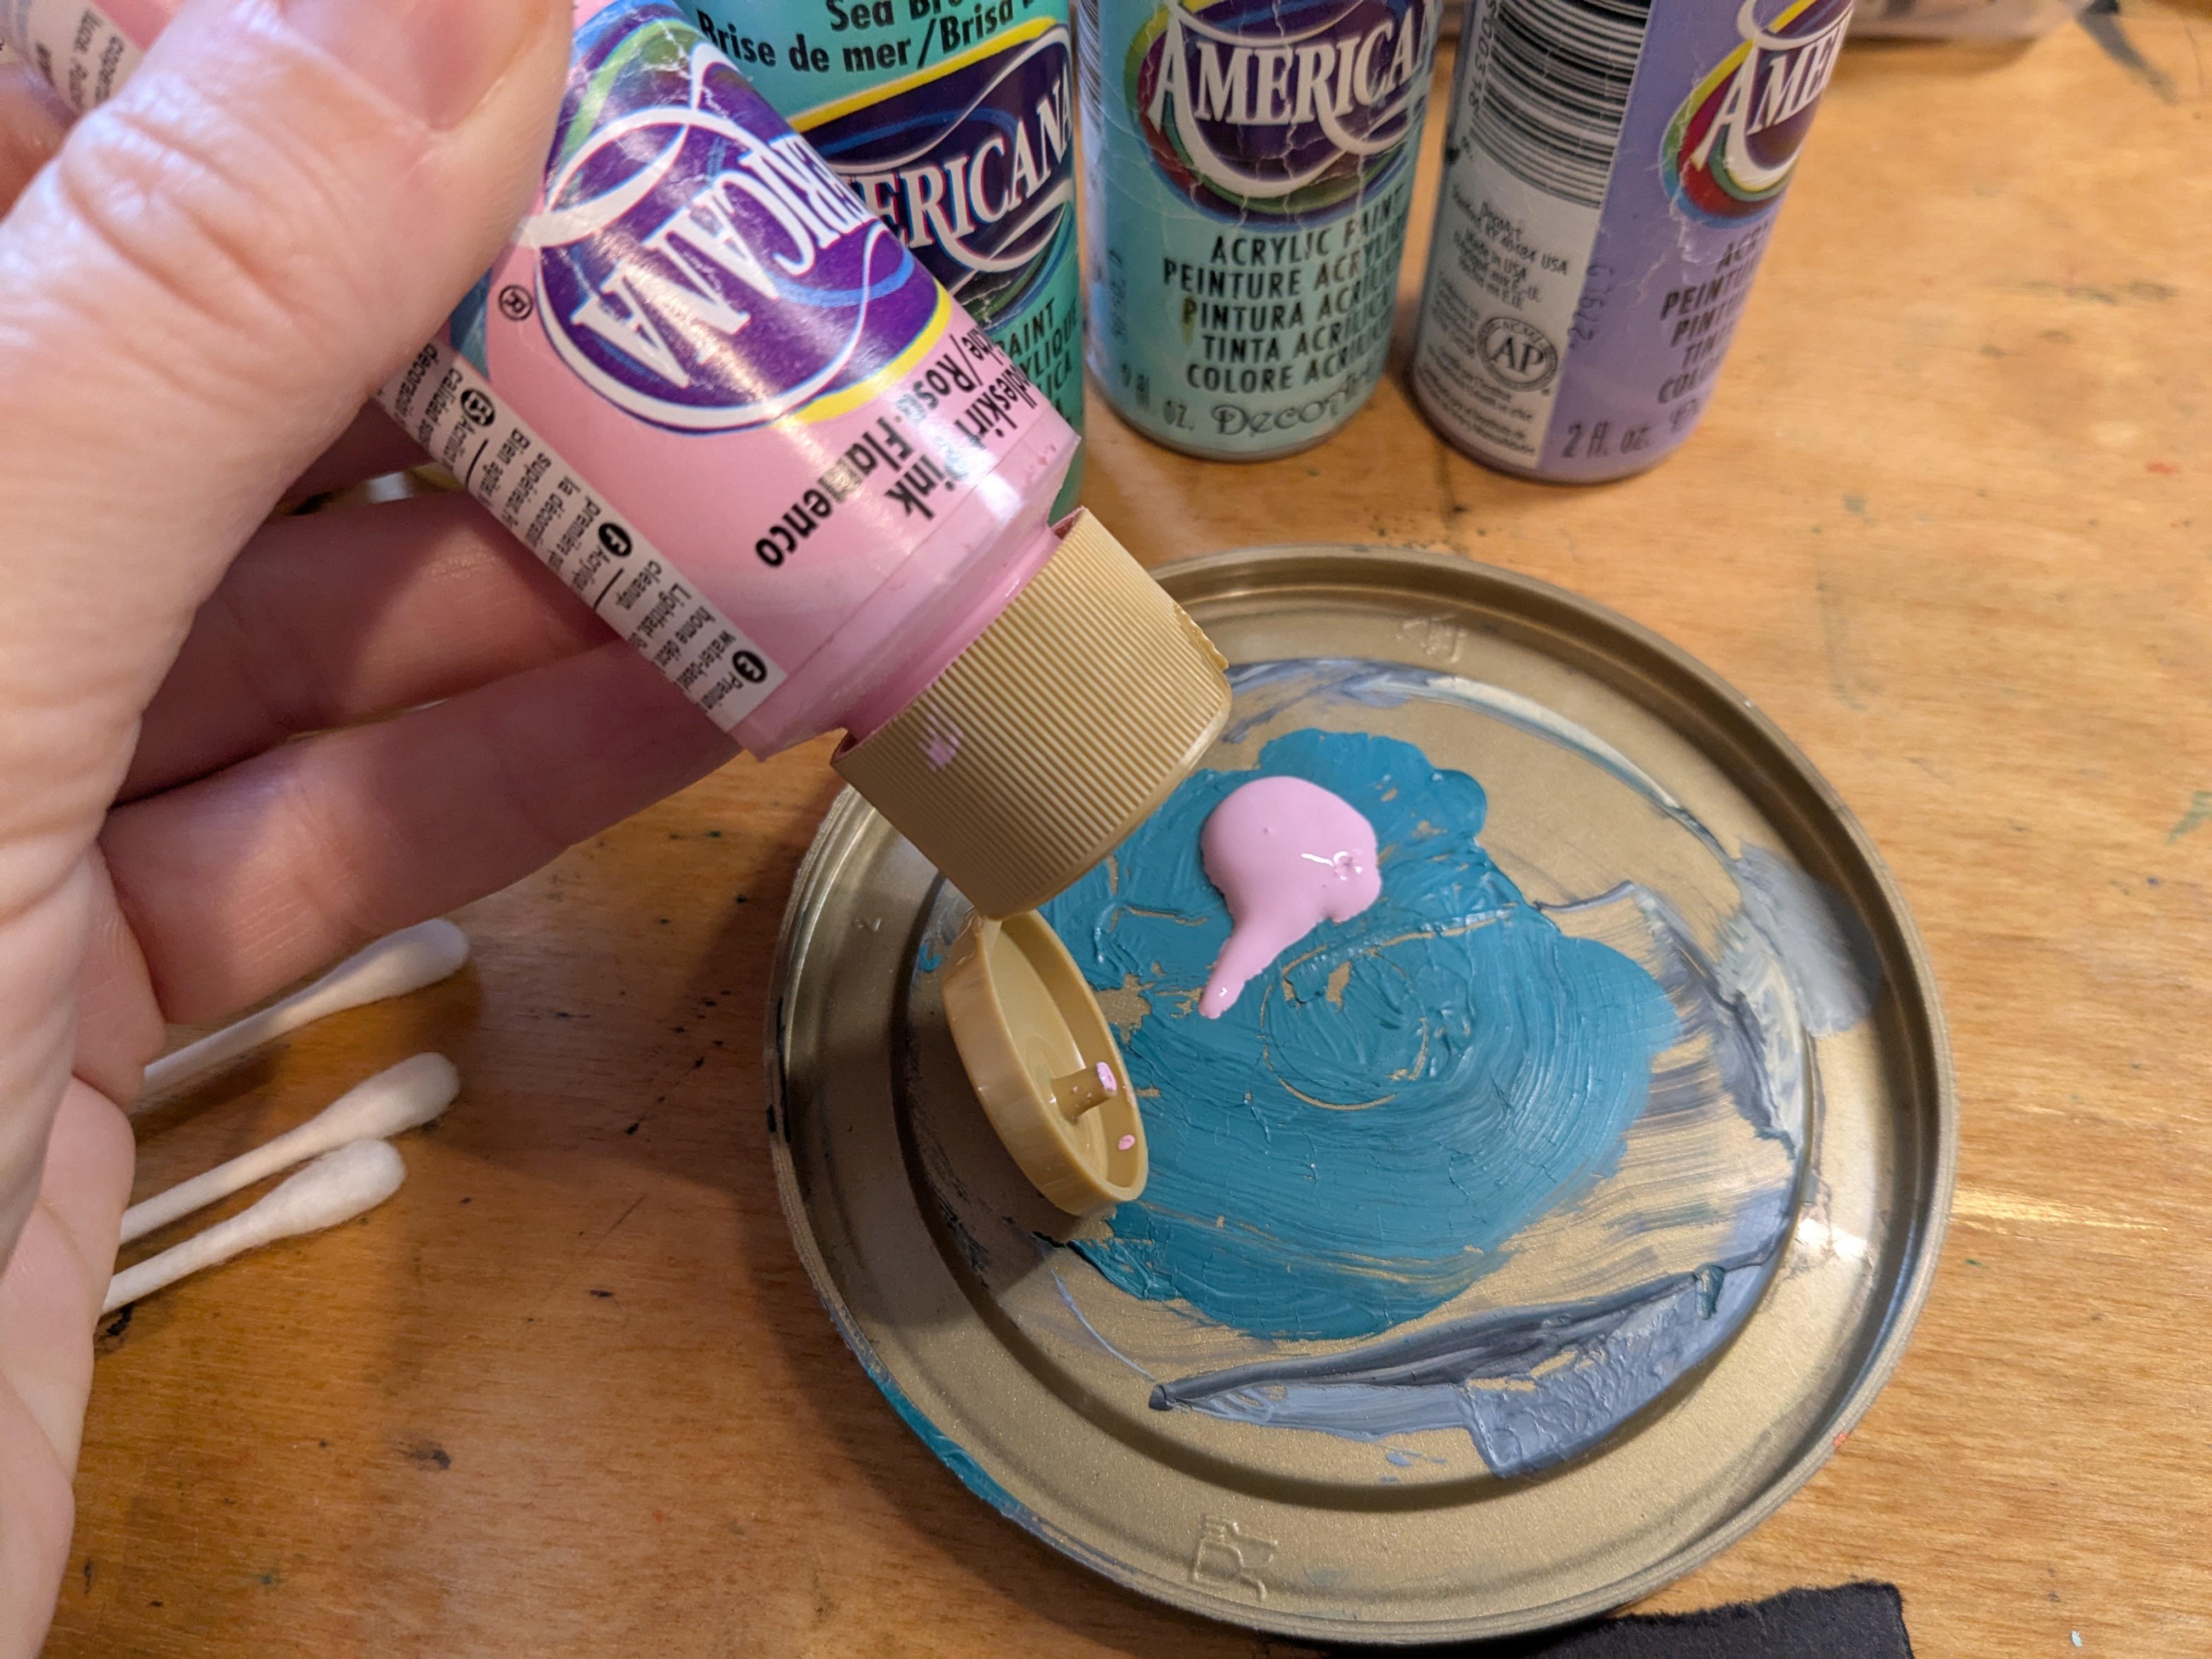
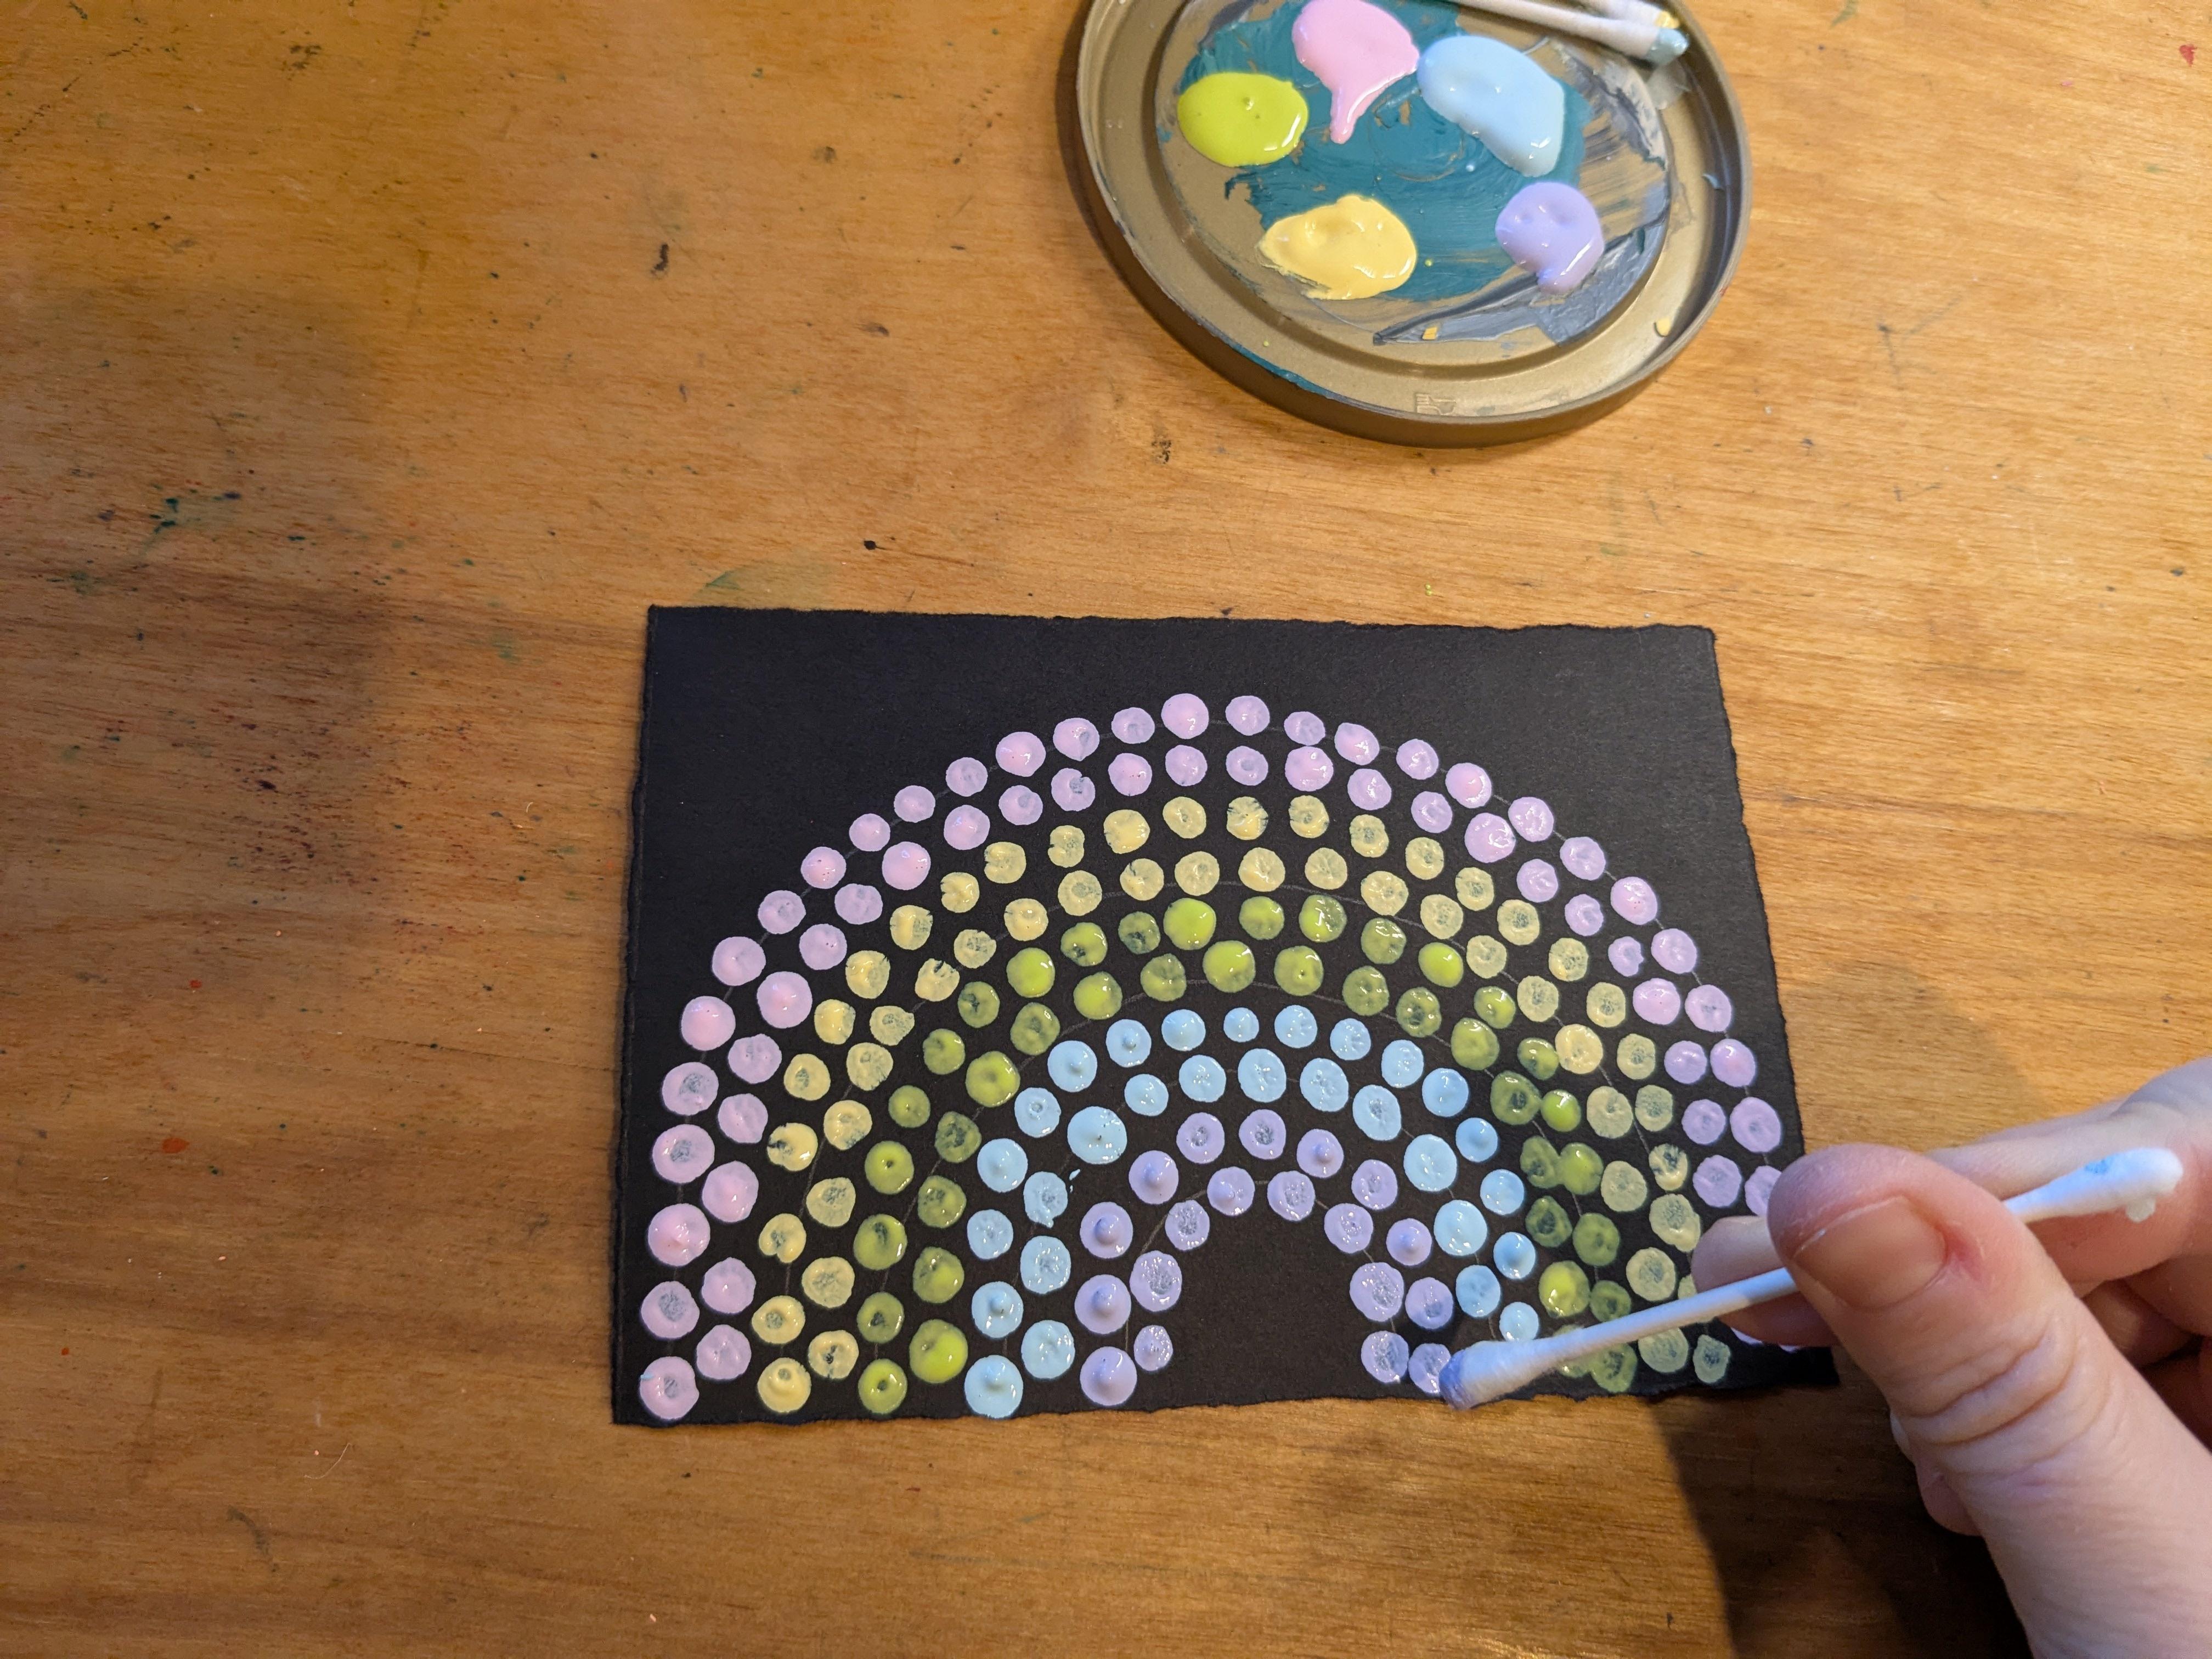
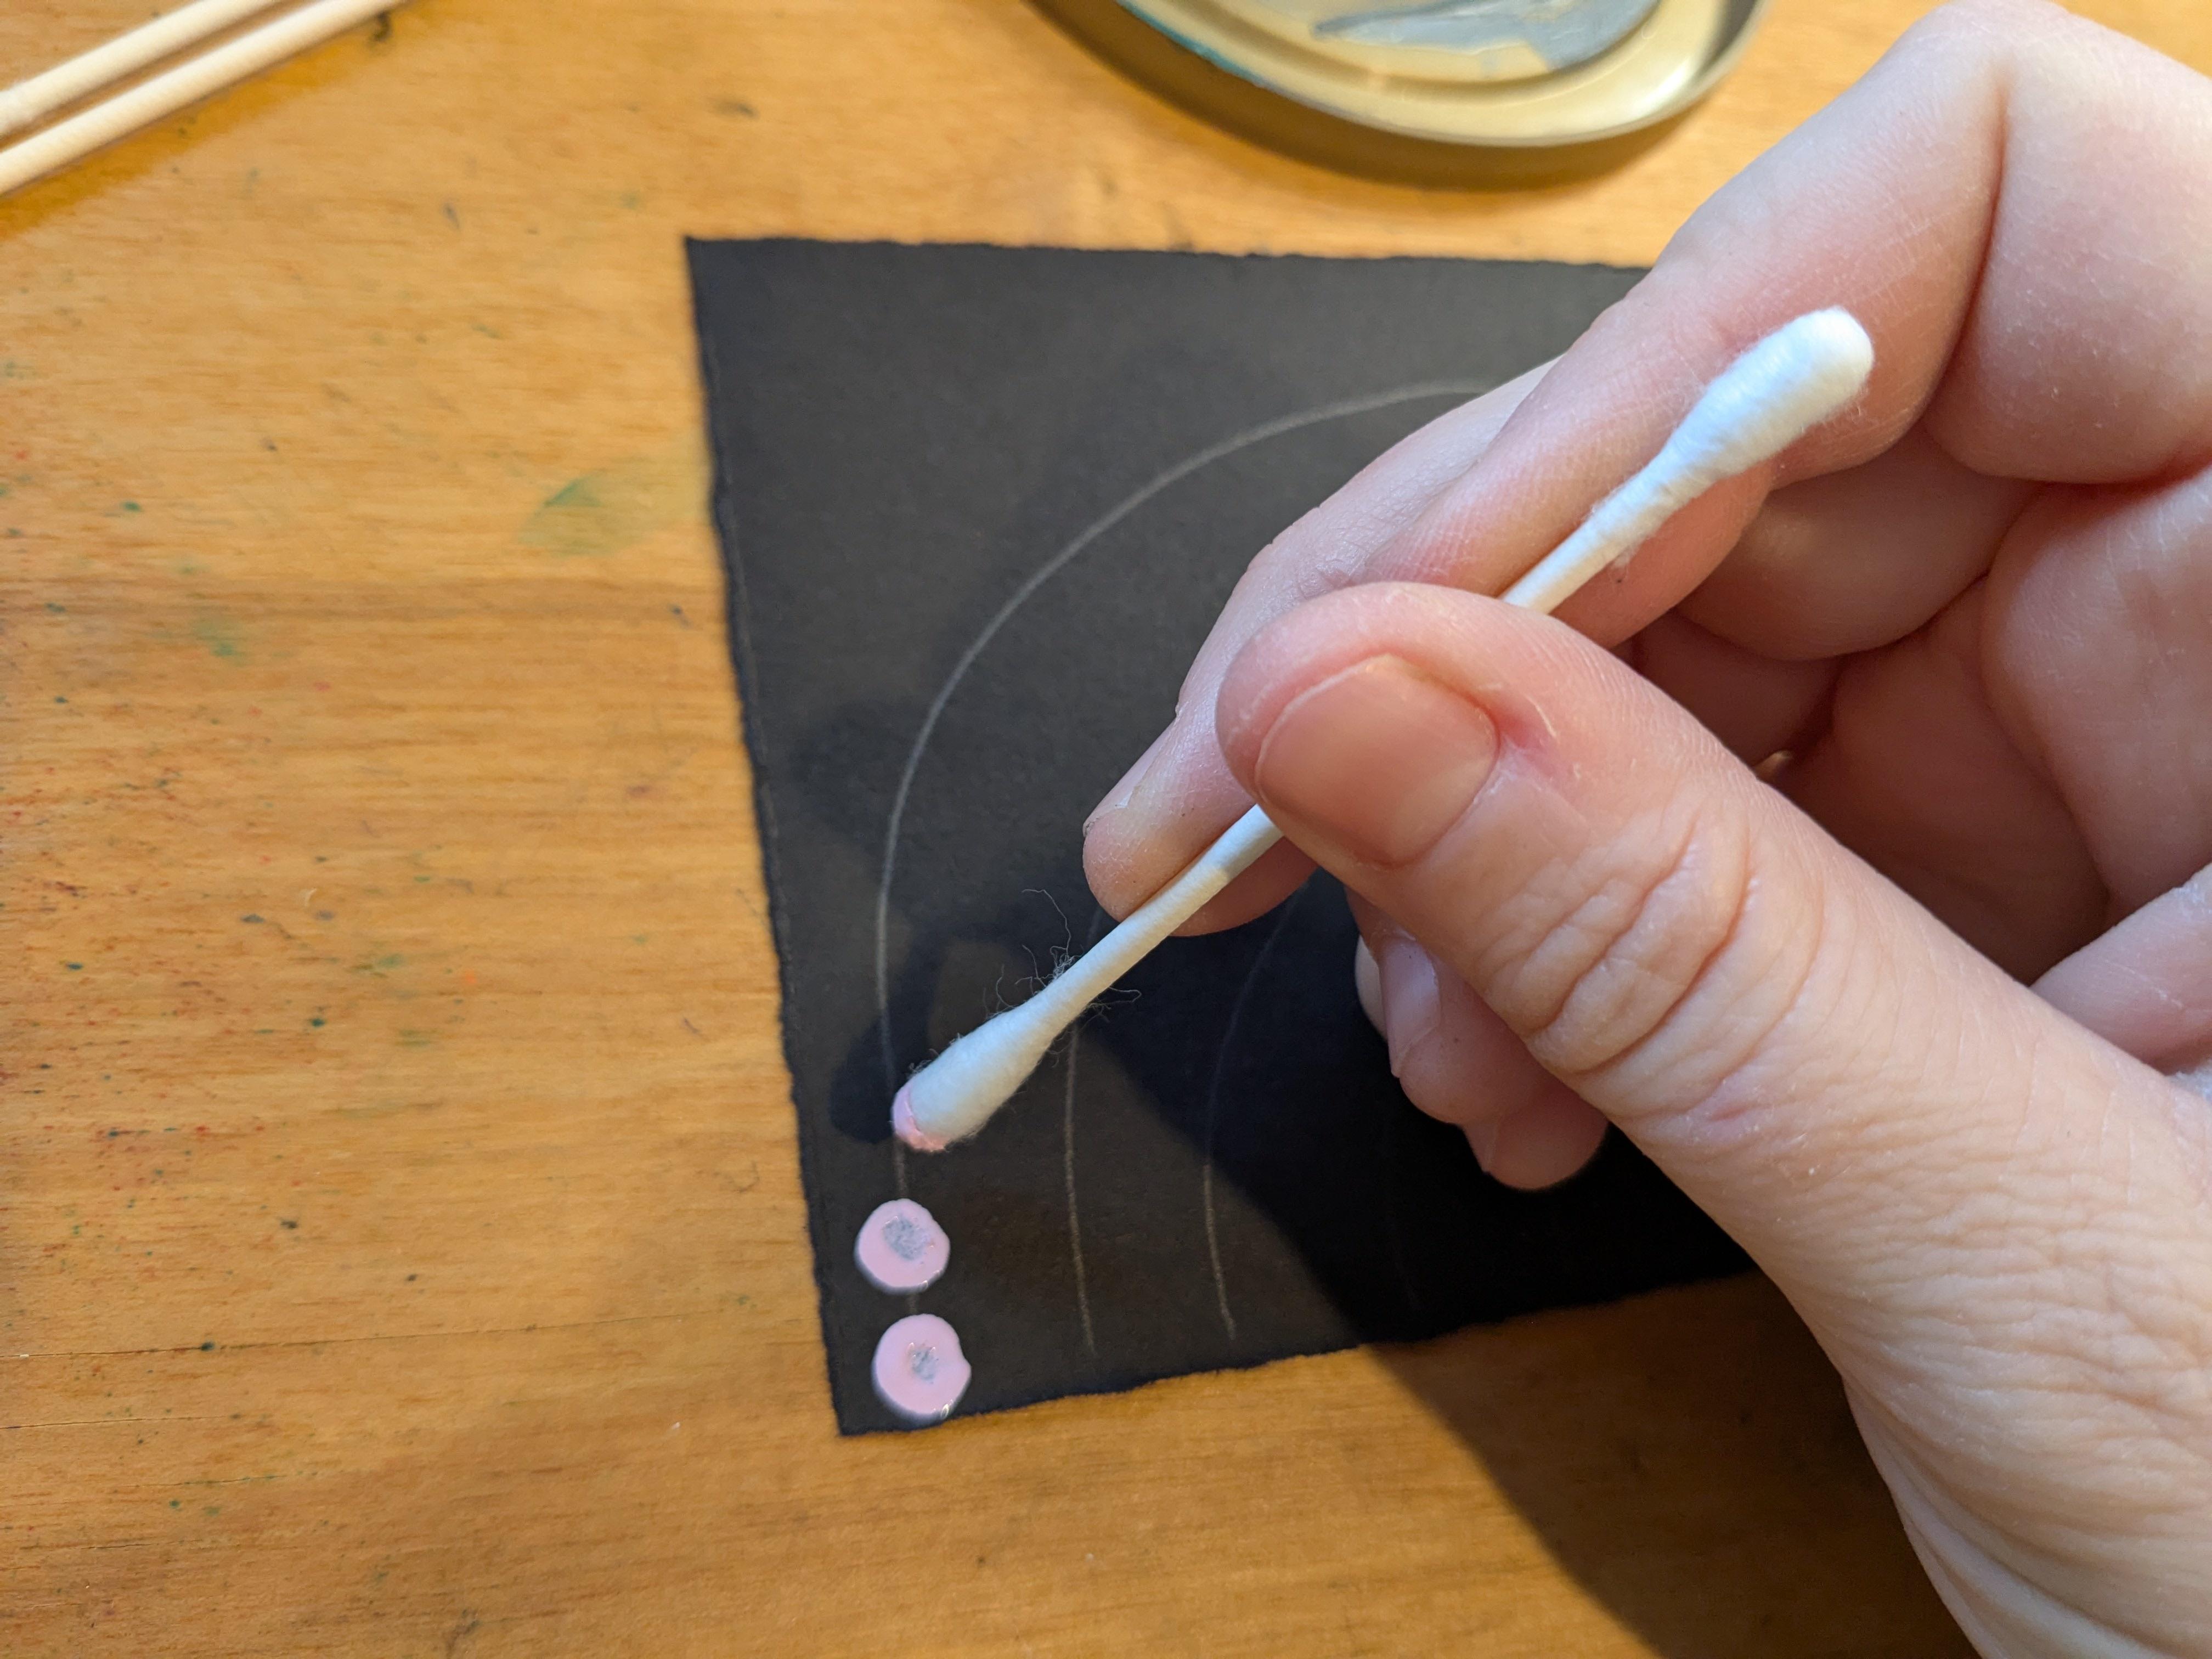
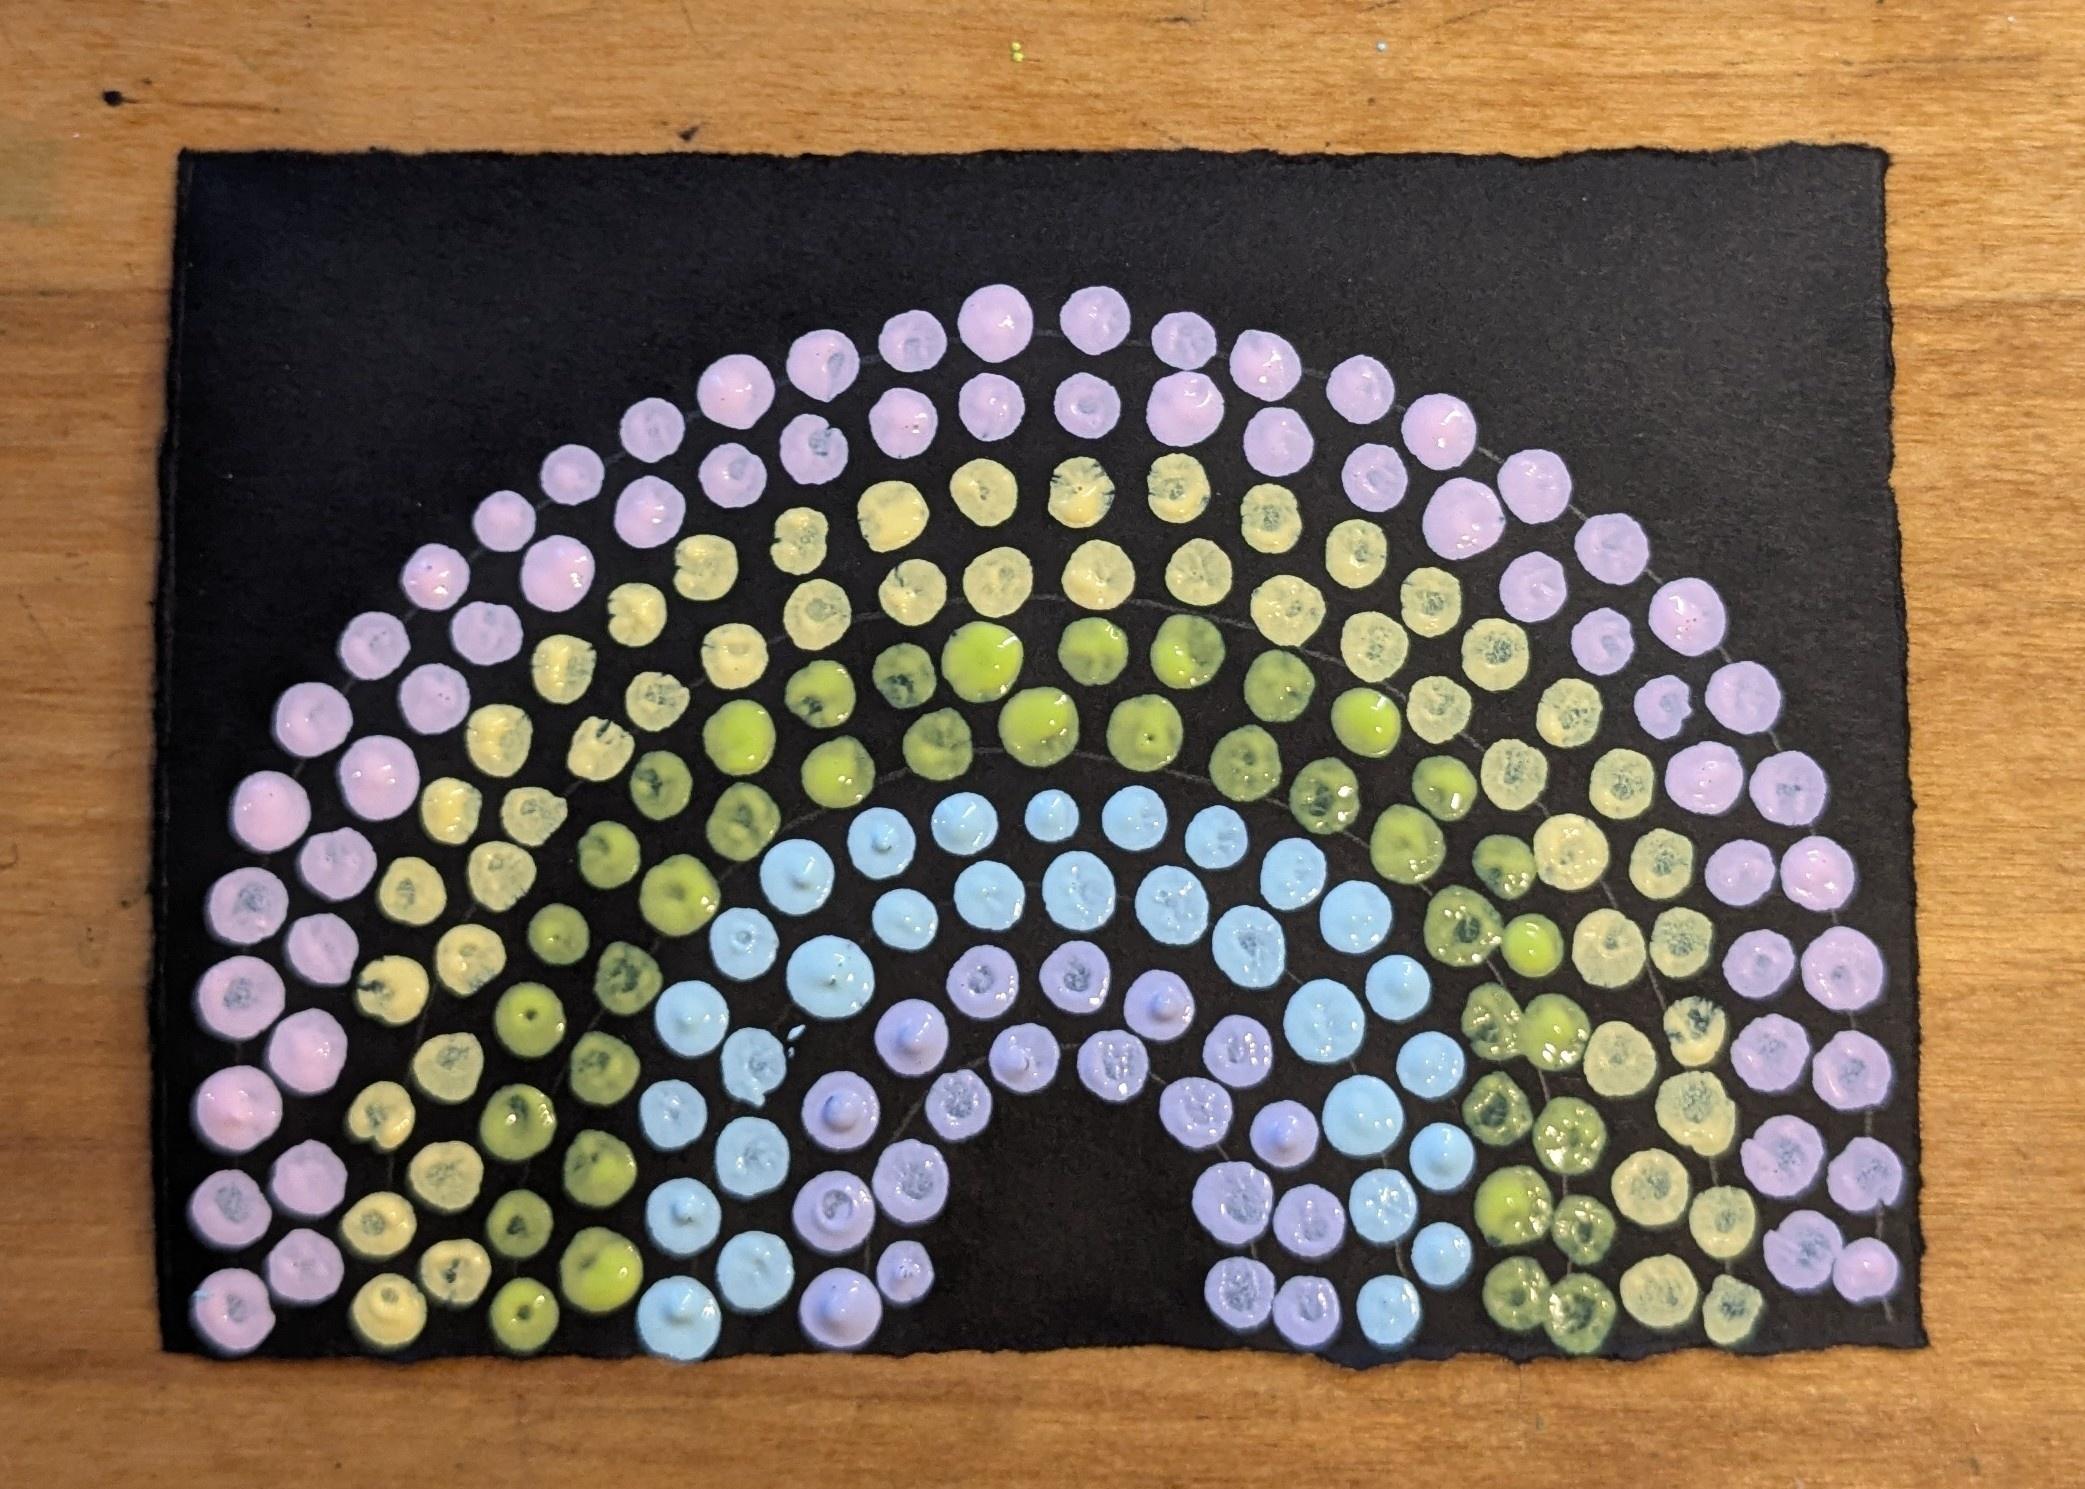
Hello, hello! It’s Missy, guest blogger and artist here at PBS Utah. Sometimes it’s fun to use common household objects to paint with instead of a paintbrush. Today I pulled out some Q-Tips and painted with those. I created a dot painting. Here’s how!

Supplies

Filer image
  • Q-tips
  • Pencil
  • Black cardstock or construction paper
  • Pastel craft paint
  • A recycled lid to use as a palette

Instructions

Filer image
Filer image
Filer image
Filer image
Filer image
Filer image
  1. Take your black paper and pencil. Lightly draw a curving rainbow shape.
  2. Squeeze some red/pink paint onto your lid palette.
  3. Dip a Q-tip in the paint and dot it on your black paper at the top of your rainbow.
  4. Dot over and over along the curved line of the top of the rainbow.
  5. Squeeze some orange paint onto your lid and repeat steps 3 and 4. Use the other end of your Q-tip.
  6. Continue with yellow, green, blue and purple using a new Q-tip/other end of the Q-tip for each color.
  7. Let your painting dry.

Section Header

How cool is that?! A rainbow made from just dots of paint! Try this same technique with toothpicks, chopsticks, sticks from outside, etc. Be creative and have fun!

Filer image element 

Want to be a part of ANTIQUES ROADSHOW's 30th anniversary season? The @RoadshowPBS 2025 Production Tour is stopping in Salt Lake City, UT on June 3! Enter to win a pair of free tickets >

STREAM ANYTIME, ANYWHERE