


Hello! My name is Missy, and I’m an artist and arts & crafts blogger here at PBS KIDS Utah. I was walking around the grocery store the other day, saw the many types and colors of dry beans, and was reminded of a project I did when I was in elementary school: bean art!
Supplies:
- Dried beans/rice (2+ different colors) in small bowls
- Pencil
- 8”x10” piece of cardboard
- Liquid glue (clear is best)
- Ruler (optional)
Instructions:
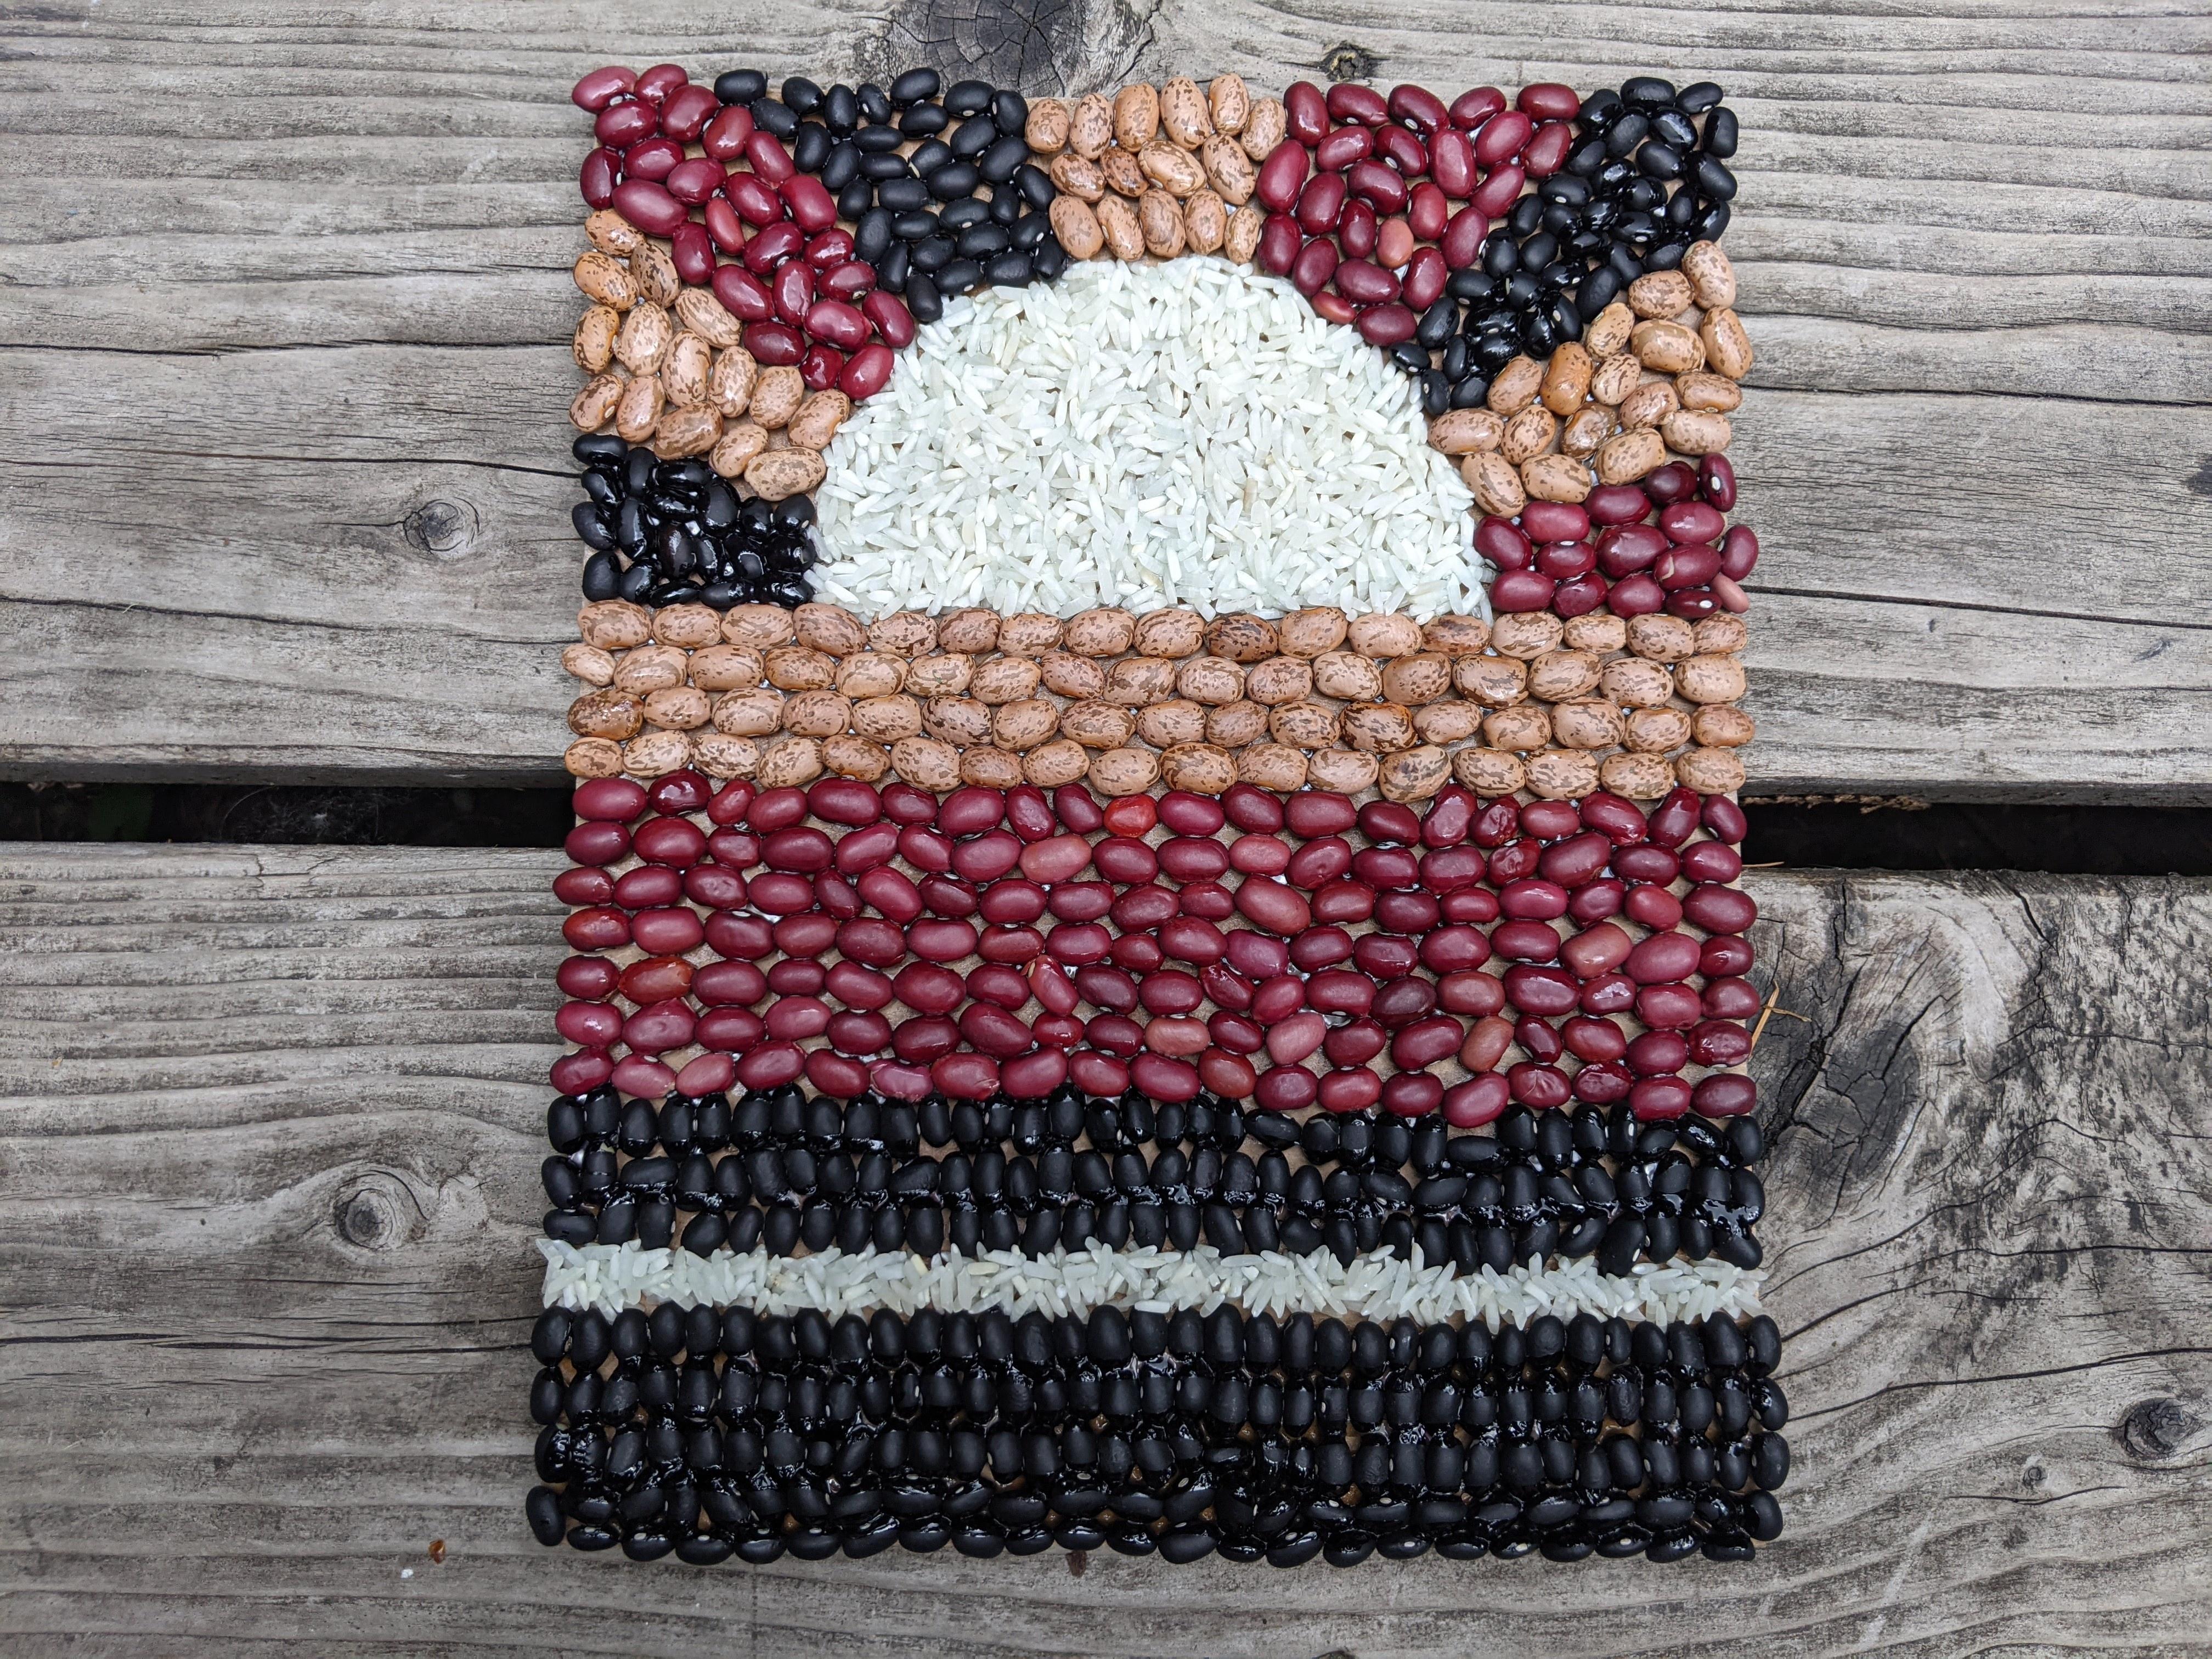
- Using your pencil (and ruler if you like), draw a simple design on your cardboard. I drew a super simplified sunset over the water.
- Plan which beans go in which spaces. You can write the name of the color in the space.
- Begin with one space in the middle of your cardboard. Fill that space with a layer of glue. Start placing beans, one by one, to fill the space.
- Move onto another space. Fill that area with a layer of glue and place the beans you chose for that space.
- Continue glueing beans to fill all the spaces on your cardboard.
- Let the glue dry for 12+ hours. If your glue dries clear, you can add an extra layer of glue on top of the beans to help secure them even more.
Wrap-up:
Ta-da! Now you have an awesome piece of bean artwork! You can display it on a shelf, give it to friend or family member as a gift (Father’s Day is coming up), or glue a string to the back of it and hang it on the wall. Have fun!

.jpg)
.jpg)