
Regrowing Veggies From Kitchen Food Scraps

Email share
Kitchen scraps growing

Looking to green up your eating habits this year? Did you know you can grow a head of lettuce, or a new stalk of celery in two weeks or less? Lessen your trips to the grocery store for your fresh greens and grow them in your own home.

An easy way to be healthier, reduce food thrown in the trash, and save money is to grow your own veggies from kitchen scraps. No seeds required. That celery bottom you are about to throw away? Use it! Have a sweet potato that’s a bit too old and is growing eyes? Grow a new one! All those food scraps filling up your garbage can are money and delicious ingredients being thrown away. 

The Modern Gardener team decided to try the project ourselves to see if it’s as easy as it looked. While this project is relatively easy, there are some important do’s and don'ts to follow so that your plants grow healthily and happily. We learned a few things along the way and we can’t wait to share them with you.

Step 1: Choosing Your Veggies

There are many lists floating around the internet with fruits and veggies you can grow from kitchen scraps, but many lists exclude regrowing time and difficulty. Regrowing a pineapple, for example, is far less expeditious and less practical than growing a celery stalk—which only takes a week or so. You may have to wait three or more years before seeing your first pineapple fruit! So, we have compiled a comprehensive list of plants in three separate categories: Easy, Intermediate, and Advanced. We have also included the grow time, care requirements, and what to actually expect.

Plant List

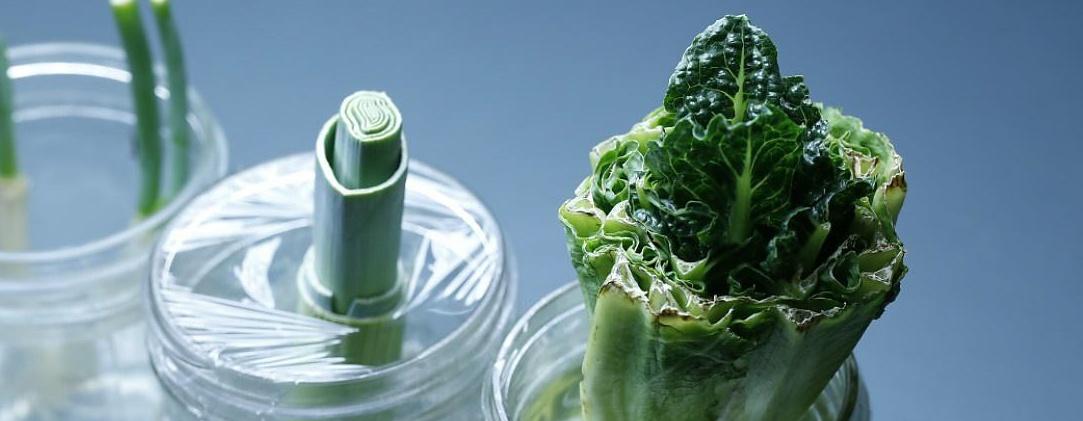
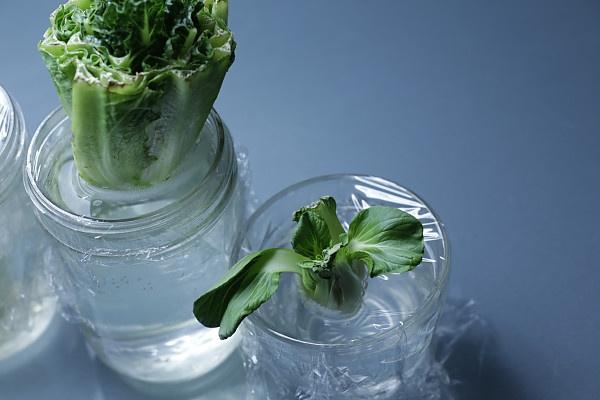
We decided to stick to the easy stuff. We chose green onion, leek, bok choy, and romaine lettuce. These were all listed as easy and fast to grow and we wanted to start with the basics. Choose your vegetables based on what you’ll actually want to eat and use for recipes, as well as what’s realistic for you to grow in your home. But this comprehensive list can help you decide what to grow in your home.

Easy:
Grow time 5-7 days to full regrowth with a high success rate:

  • Celery
  • Leeks
  • Green onion
  • Lettuces:
    • Romaine
    • Iceberg
    • Swiss chard
    • Kale
    • Bok Choy
    • Napa cabbage

Grow time 1-2 weeks for greens to appear, but several months before harvest:

  • Potatoes
  • Sweet potatoes
  • Peppers

Medium:
Grow Time: 7-10 days for greens to appear, but several months before harvest:

  • Garlic
  • Onion
  • Ginger
  • Carrots *Note: Won’t actually grow more carrots, but will grow a plant that will produce seeds which you can plant!

Grow Time: 14-21 days for leaves and roots to appear, but several months before harvest:

  • Lemongrass
  • Tomatoes (which are actually a fruit, we know) are typically regrown from slices.

Advanced:
Grow Time: 6-8 weeks for roots, *but several years for fruit

  • Pineapple
  • Avocados

Grow Time: 2-3 weeks

  • Strawberries
  • Mushrooms


Deciding Your Lighting And Growing Conditions

Water

First, be sure to change your water every day. Stagnant water from decomposing plant matter is stinky and can be a potential health hazard. Second, be sure your water is dechlorinated and either "hard water" or treated with reverse osmosis. High amounts of minerals like calcium and sodium chloride found in soft water can eventually kill your plants and will most definitely stunt growth. We encountered this problem during our office project. A small amount of soft water is fine, but try to use hard water or reverse osmosis water if possible.

Light

For our office project, we decided to use a grow light. Initially, the plants were not placed near any natural light. We used a 24" square foot, 24-watt fluorescent lamp. It was hung 10 inches above the plants and left on during the day and turned off at night, kept on a roughly 12-hour on, 12-hour off schedule. 

It appeared to work for the first few days. But while the plants grew quickly at first, the growth stagnated after several days and was slower than expected.

Full Disclosure: Our bok choy didn’t make it through the first week, sadly... #gardeningfail 

After some research, we learned that it is important to keep in mind several factors:

  1. Lighting Type: The type of lighting you’re using actually matters. There are three main technologies used:  1) Fluorescent, 2) LED, and 3) HID lighting. Decide which is best suited to your budget and planting needs.
  2. Amount of Lighting: The amount of light they’re getting, i.e. duration, intensity, and proximity will affect growth.
    1. Duration: Many gardening experts recommend 12-18 hours for seedlings or younger plants and slowly hardening them off, or weaning them, to natural conditions. Different plants have different lighting needs. Additionally, plants, like humans, need periods of darkness and rest. A rookie mistake many make (like we did) is to leave the grow light on 24/7. We recommend buying a light timer to ensure consistency and accuracy.
    2. Intensity: Growth rate is directly related to the amount of light. Generally, as a rule, low light levels mean slower photosynthesis, and high light levels encourage it. Seedlings and edible plants will need more light than adult plants, or low light-loving plant varieties, as they expend more energy.
    3. Proximity:  Some lights give off more heat than others. Fluorescent lights can often remain several inches above most plants without any damage or burning, for example. Read the recommendations from the manufacturer to maintain a safe distance from the plants while still providing them enough light.
       
Filer image

Step 2: The Process

As mentioned earlier, the growth across the board was very slow after day three. For week two, we moved the plants to a west-facing windowsill to give them a natural light cycle. Natural light seemed to do the trick. The plants grew at a slightly quicker rate and there was no burning, curling or rotting, as we saw with the grow light. 

By week two, the leek and the green onions were fully grown and ready to harvest but the romaine was still too small to harvest. It was then repotted from water into a soil medium and kept moist to see if this would change the growth rate. By the end of week three, it had grown only another inch or so. 

Although grow lights can be effective, you may need to adjust your light settings to determine the ideal light intensity and duration for optimum growth and set a timer to ensure consistency. If you don't have space for grow lights or just not really digging the idea, we recommend putting your plants near a brightly lit window. South, east, or even west-facing windows tend to receive more direct light than north-facing windows, which receive the weakest light and, most likely, won't be sufficient.   

More Tips

If something doesn't look or smell right, throw it out immediately and don't consume it. Be vigilant in watching your new growth daily and monitor any changes you see.

At the end of the day, there are no garden experts only garden problem solvers. Each project has a unique growing environment with unique needs and struggles. If you are struggling or something isn’t growing “correctly,” simply try a new method or experiment with growing conditions, such as lighting, watering, growing medium, temperature, or humidity. Don’t be afraid to fail. Part of the fun of home gardening is learning to enjoy the process and learning something new each time.

Step 3: Harvesting Your Veggies

The final step is to harvest your vegetables and enjoy your fresh greens in recipes. Show us your own regrowing vegetables from food scrap projects by tagging us on Instagram or Facebook and, as always, happy gardening!

If you live in Utah and have a garden or garden project that you'd like to be featured on Modern Gardener, click here!

STREAM ANYTIME, ANYWHERE