Did you know that clippings, plant trimmings, leaves, and other organic refuse from your yards are perfect for composting and can be recycled back into the garden?
Utah State University’s Extension Program reports that more than 30% of landfill waste is simply organic yard materials. Approximately 3 million pounds annually, which translates to 600,000 pounds of food per day, is wasted here in Utah alone.
Why are so many precious resources ending up in the landfill and what can we do to help as conscious citizens and gardeners?
Composting!
Composting is the ultimate recycling action.
Composting helps promote bigger, healthier crop growth, amends and restores unhealthy or contaminated soil and helps improve air quality!
We decided to consult the experts— our friends at Wasatch Community Gardens—and create a comprehensive guide to composting for novice to experienced gardeners. Whether you are gardening on a farm or a smaller, urban setting, we have compiled a step-by-step plan, chock-full of practical advice for composting in the Greater Salt Lake area.
The roadblock many new gardeners face isn’t having the materials needed to start composting; it’s knowing what to do with them now that you have them. Let’s face it, how many times have you been stuck with a box of rotting vegetables and coffee grounds with good intentions, but have just given up because the process was too smelly or too confusing?
This video and guide will help you understand the composting process and work with Mother Nature to let the magic happen. So let’s start!
How does composting work?
The moment you put the raw materials in your pile is when composting begins; in fact, they often start decomposing before you add them! In the beginning, microarthropods and bacteria quickly consume the materials. The microorganisms use oxygen, releasing CO2, which creates heat and breaks down the materials. Fungi, protozoans, worms, and other insect friends eventually join them for lunch, continuing the decomposition process.
In order for this process to happen quickly and successfully, a combination of elemental factors needs to happen.
Step 1: Site Selection
James Loomis tells gardeners to “think like Goldilocks” when choosing a site to compost. The site shouldn't be too big or too small, too dry or too wet, and not too sunny or too shady. It is best to keep the compost heap out of the direct sun or drying winds and to make sure that you are able to keep excess moisture from rain and snow off of the pile. Make sure there is no standing water in the site, as this can lead to anaerobic conditions in the pile. Also, make sure it is easily accessible to you and not obstructing your neighbor’s property or public property.
After selecting a site, you can choose how to contain your compost. You can simply heap it into piles (no money or assembly required), hoop or box it in using mesh fencing or wire, wood, cinder blocks, or any other material you fancy; or use compost tumblers for a clean-looking, pest-free option. Some choose to DIY their own compost tumblers or elect to buy one.
Step 2: The Raw Materials
Materials Needed:
A composting site (a tumbler, heap/pile, box)
Organic Materials (kitchen and yard waste) including:
Animal manure
Shredded paper (non-glossy)
Grass and other yard clippings
Vegetable scraps
Coffee grounds
Thermometer
Shovel
Shade/Covering from the elements
A garden! (or a patio)
The key to a successful compost is the correct Carbon to Nitrogen ratio (expressed as C: N). Well, actually, it needs carbon, nitrogen, water, and oxygen to function properly.
The Salt Lake County Recycling program recommends an organic carbon to nitrogen ratio best for composting (25-30:1). Visually, this will look like you have twice as much brown material as green material.
To calculate your final carbon to nitrogen ratio, make sure you are starting with equally measured amounts of each material used; James Loomis prefers to use 5-gallon buckets for this. Then, simply add up the total C:N ratios for each of the buckets full of ingredients, and divide by the number of buckets.
Size: Additionally, a pile must be at least 4’ x 4’ x 4’ to achieve and retain enough heat to break down ingredients actively. This size is ideal. Anything much larger is too big and will compress the pile, starving it of oxygen.
If done right, you could have USDA-grade organic compost in as little as 15 days.
Step 3: Temperature and Turning
The key to quickly achieving that nutrient-dense, dark, and pleasant-smelling final product is the proper amount of turning and temperature. Aerobic organisms need plenty of oxygen and moisture, but not too much moisture. Too much water will “drown” the organisms.
When we turn our piles, we are infusing our pile with oxygen and allowing the microorganisms to thrive and do their jobs. Make sure you are mixing the ingredients thoroughly and evenly, completely turning the pile each time.
Completely turning the pile is important. Make sure the outer layer of the pile becomes the center of the new pile when turning and the previous center becomes the outside. This allows all of the ingredients to spend the appropriate amount of time in the hot center.
For thermophilic, fast-decomposing piles, the recommended threshold is between 131F and 160F. Temperatures lower than 131 degrees will not sterilize weed seeds and harmful pathogens. At temperatures higher than 160 degrees, we begin to kill our beneficial organisms and lose nutrients.
Use a compost thermometer that is designed to probe into the center of the pile to monitor temperatures. With the proper carbon to nitrogen ratio, our pile will heat to 131 degrees within two to three days. (Oftentimes, much faster.)
If it does not get that hot within four days, this means there is not enough nitrogen in the pile, and you will need to add more materials and reset the clocks again with this step.
Monitor the pile daily, and turn when the temperature drops below 131F, or at least every three days for the first two weeks. This will result in the pile heating up again.
During the hot summer months, it is often necessary to mist the outside of the pile every day or every other day to maintain appropriate moisture levels. Keep monitoring the temperature and turn it every time it drops below the minimum temperature threshold for about five to 10 rounds.
Step 4: Final Mixing and Curing
Knowing when the pile is done isn’t as difficult as some may think.
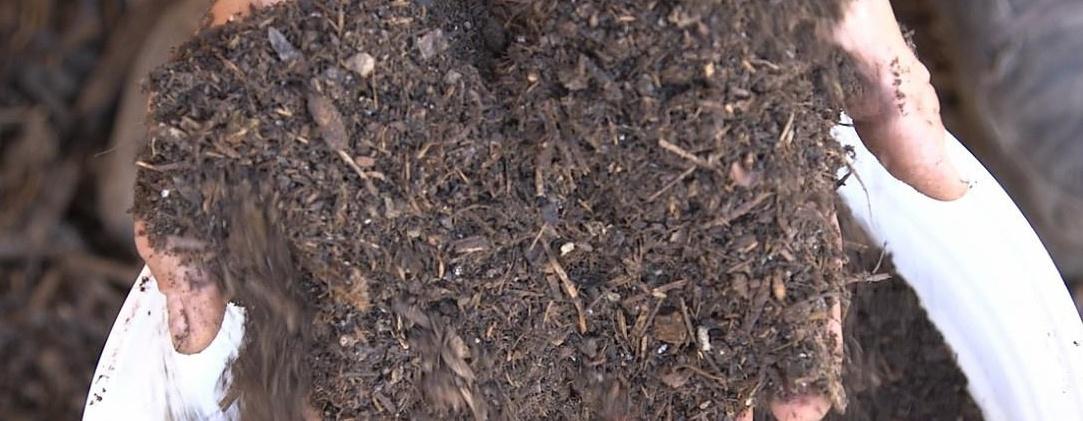
The pile will look and smell done. What does this mean?
There will be no residual decomposition smell; the pile should have a pleasant, earthy smell. You will not be able to recognize any of the ingredients in the pile. (In other words, no half-decomposed banana peels leftover.)
To achieve this, after you have turned the pile for roughly five to ten rounds and all the materials are distributed evenly. Finally, leaving the pile to cure for anywhere from one to four weeks. This allows the beneficial fungi and other microorganisms to complete the maturation stage of the pile.
During this curing period, James recommends turning the pile only once to preserve the moisture of the pile and allow it to age into a high-quality product. Additionally, check the temperature again to ensure there is no further heating action happening.
Finally, if desired, you can use a sifter to separate any larger chunks or woody pieces from the more finely textured humus. These larger materials are great when used as mulch in the yard or ground cover in flower beds, or you can put these chunks back into your next batch of compost. This is a great practice because these materials are loaded with beneficial nutrients and microbes that will help to speed up the process for your next pile.
Happy Composting!
"Composting Is A Slow-Motion Manifestation Of Earth Magic."
~James Loomis
If you live in Utah and have a garden or garden project that you'd like to be featured on Modern Gardener, click here!


.png)